
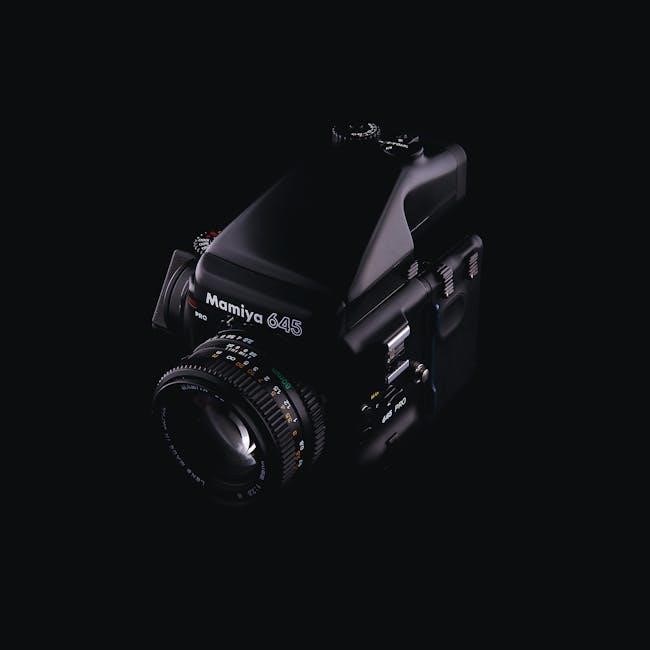
vantrue n4 pro manual
Welcome to the Vantrue N4 Pro Manual, your comprehensive guide to understanding and utilizing this advanced dash cam. This manual covers setup, features, and troubleshooting;
1.1 Overview of the Manual
This manual provides a detailed guide to the Vantrue N4 Pro dash cam, covering its features, installation, and operation. It is designed to help users understand and utilize the device effectively. The manual is divided into sections, including unboxing, installation, key features, settings, app usage, troubleshooting, and maintenance. Each section offers step-by-step instructions and practical advice to ensure optimal performance. Whether you’re setting up the camera, configuring video settings, or resolving common issues, this guide offers comprehensive support. By following the manual, users can maximize the benefits of the Vantrue N4 Pro, including its 4K recording, night vision, and parking mode. It also covers advanced features like GPS and Wi-Fi connectivity, ensuring a seamless experience.
1.2 Importance of the Manual
The Vantrue N4 Pro manual is essential for ensuring proper installation, configuration, and operation of the dash cam. It provides clear instructions to help users understand the device’s features, such as 4K recording, night vision, and parking mode. The manual also offers troubleshooting tips to resolve common issues, ensuring optimal performance. By following the guide, users can avoid potential setup mistakes and maximize the camera’s functionality. Whether you’re a first-time user or experienced, the manual serves as a valuable resource for unlocking the full potential of the Vantrue N4 Pro. It helps users maintain their device, update firmware, and address technical challenges effectively.

Unboxing and Accessories
The Vantrue N4 Pro box includes the dash cam, front and rear cameras, wiring kit, adhesive mounts, and accessories for installation and functionality.
2.1 What’s Included in the Box
The Vantrue N4 Pro box contains the main dash cam unit, front and rear cameras, a wiring kit, adhesive mounts, and necessary cables for installation. Additionally, it includes an adhesion promoter for securing the cameras and an anti-static sticker for windshield cleaning. The package also provides a user manual for guidance. The wiring kit allows for voltage setting adjustments, ensuring proper power management. All accessories are designed for easy installation and optimal performance. Make sure to verify the completeness of these items upon unboxing to ensure a smooth setup process.
2.2 Checking for Completeness
Before proceeding with installation, carefully inspect the contents of the Vantrue N4 Pro box to ensure all components are included. Verify the presence of the main dash cam unit, front and rear cameras, wiring kit, adhesive mounts, and necessary cables. Check for the adhesion promoter and anti-static sticker, which are essential for proper installation. Ensure the user manual is also present for guidance. If any items are missing or damaged, contact the seller immediately to avoid delays. A complete set ensures a smooth installation process and optimal functionality. Taking a few minutes to verify completeness now can prevent issues later. Proper preparation is key to a successful setup.

Installation Guide
Install the Vantrue N4 Pro by preparing the windshield with alcohol and adhesion promoter, then routing wires through the passenger door frame using the included wiring kit.
3.1 Front Camera Installation

Begin by cleaning the windshield with alcohol to ensure a secure mount. Use the provided adhesion promoter for optimal grip. Mount the front camera on the windshield, ensuring a clear view of the road. Avoid obstructing the driver’s line of sight. Route the power cable from the front camera to the car’s fuse box or cigarette lighter. Secure any excess wiring with clips or ties to maintain a neat installation. Connect the camera to the rear camera using the supplied cable, ensuring proper alignment and functionality. Finally, test the camera to confirm it powers on and records video correctly. Proper installation ensures safety and optimal performance.
3.2 Rear Camera Installation
For the rear camera installation, start by cleaning the rear windshield with alcohol to ensure a secure mount. Use the adhesion promoter provided for optimal grip. Mount the rear camera on the rear windshield, positioning it for a clear view of the road behind the vehicle. Route the rear camera cable through the passenger side door frame or another convenient location, ensuring it is hidden and secure. Connect the rear camera to the front camera using the supplied cable, making sure the connectors are properly aligned. Secure any excess wiring with clips or ties to maintain a neat installation. Test the rear camera to ensure it powers on and syncs with the front camera. Proper installation ensures comprehensive coverage and safety while driving.
3.3 Wiring and Power Connection
For the wiring and power connection, use the Vantrue wiring kit (sold separately) to ensure a seamless setup. Connect the front camera to the fuse panel, routing the wires through the passenger side door frame for a clean installation. The wiring kit allows you to set voltage thresholds for system shutdown, enhancing battery protection. Use the included hardwiring cable to connect the dash cam directly to your vehicle’s electrical system. Secure all wires with clips or ties to prevent damage. Ensure the rear camera is connected to the front unit using the supplied cable. Test the power connection by turning the ignition on and verifying the dash cam powers up. Proper wiring ensures reliable operation and protects your vehicle’s battery from over-drain.
3.4 Mounting the Cameras
Mounting the Vantrue N4 Pro cameras securely is essential for optimal performance. Begin by cleaning the windshield with alcohol to ensure a strong adhesive bond. Use the included adhesion promoter for enhanced stability. Attach the front camera to the windshield, positioning it centrally and at a height that avoids obstructing your view. Adjust the mount to align the camera lens with the road. For the rear camera, mount it on the rear windshield, ensuring it captures a clear view of the back. Use the adjustable rear camera mount to fine-tune its angle. Secure both cameras firmly to prevent any movement while driving. Test the camera angles to ensure they capture comprehensive footage. Proper mounting ensures reliable recording and minimizes vibrations for smoother video quality.
Key Features and Specifications
Discover the Vantrue N4 Pro’s cutting-edge features, including 4K Ultra HD recording, superior night vision, parking mode with motion detection, built-in GPS, and seamless Wi-Fi connectivity for enhanced functionality.
4.1 4K Ultra HD Video Recording
The Vantrue N4 Pro excels with its 4K Ultra HD video recording, capturing crisp and detailed footage at 3840×2160 pixels. This high-resolution capability ensures clarity, making it ideal for capturing license plates, road signs, and other critical details. The dash cam utilizes a high-quality CMOS sensor to enhance image quality, even in low-light conditions. With a wide dynamic range, it balances bright and dark areas, providing a more natural and accurate representation of the scene. The 4K resolution is available for both the front and rear cameras, offering comprehensive coverage. Additionally, the dash cam supports a frame rate of up to 30fps, ensuring smooth video playback. This feature is essential for drivers seeking reliable evidence in case of incidents or for capturing scenic drives with precision.
4.2 Night Vision Capabilities
The Vantrue N4 Pro boasts exceptional night vision capabilities, ensuring clear and detailed footage even in low-light conditions. Equipped with a high-sensitivity sensor and Wide Dynamic Range (WDR) technology, it captures balanced images by adjusting brightness and contrast. This feature is particularly useful for nighttime driving, where it reduces glare from headlights and enhances visibility in dark environments. The dash cam also includes a night vision mode that automatically adjusts settings for optimal performance in the dark. With its advanced noise reduction algorithm, it minimizes grain and delivers sharp, readable video quality. Whether driving through poorly lit streets or parking in dimly lit areas, the N4 Pro’s night vision ensures you capture every detail, providing peace of mind and reliable evidence when needed.
4.3 Parking Mode and Motion Detection
The Vantrue N4 Pro features an advanced Parking Mode that monitors your vehicle even when it’s turned off. This mode is activated when the dash cam detects no movement for a set period, ensuring your car is protected in stationary situations. The motion detection function triggers recording automatically if any movement is detected around the vehicle, providing an added layer of security. For parking mode to function properly, a hardwire kit is required to connect the dash cam directly to the car’s battery. The N4 Pro also includes a G-sensor that detects impacts and saves the footage to prevent overwriting. This combination of features ensures your vehicle is safeguarded, offering peace of mind whether you’re driving or parked.
4.4 Built-in GPS and Wi-Fi
The Vantrue N4 Pro is equipped with built-in GPS, which accurately records your vehicle’s location, speed, and time. This feature is invaluable for tracking your route history and providing evidence in case of disputes or accidents. The GPS data is seamlessly integrated into the video footage, ensuring all recordings are timestamped and geotagged. Additionally, the dash cam includes Wi-Fi connectivity, allowing you to connect it to your smartphone via the Vantrue app. This enables easy video playback, file transfers, and settings adjustments directly from your phone. The combination of GPS and Wi-Fi enhances the overall functionality, making the N4 Pro a versatile and user-friendly dash cam for modern drivers.
Settings and Configuration
Configure your Vantrue N4 Pro to suit your preferences. Adjust video resolution, enable parking mode, customize screen settings, and set up voice commands for a tailored experience.
5.1 Video Settings and Resolution
The Vantrue N4 Pro allows you to customize video settings to optimize quality and storage. Set resolution up to 4K Ultra HD at 30fps for crystal-clear footage. Adjust frame rates and exposure compensation to suit lighting conditions. Enable HDR for enhanced dynamic range and color accuracy. Choose between H.265 or H.264 codecs for efficient compression. You can also select loop recording intervals and set the G-sensor sensitivity for automatic accident detection. These settings ensure your recordings are tailored to your needs, balancing quality and storage capacity effectively.
5.2 Parking Mode Configuration
The Vantrue N4 Pro offers advanced parking mode settings to monitor your vehicle when stationary. Enable parking mode to activate 24/7 surveillance, using the built-in G-sensor and motion detection. Set sensitivity levels for motion detection to reduce false alerts. Choose between time-lapse recording or event recording for efficient storage use. Configure low battery cutoff to prevent drain and ensure your car starts normally. Use the app to schedule parking mode activation or set it to turn on automatically when the ignition is off. These features provide peace of mind, knowing your vehicle is protected even when unattended.
5;3 Screen and Display Settings
Customize your Vantrue N4 Pro’s screen and display settings for optimal viewing. Adjust the screen brightness to suit your preference, ensuring clarity in both day and night. Enable auto-dim to reduce glare in low-light conditions. Set the screen saver to turn off the display after a period of inactivity, preserving battery life. Choose between different display formats, such as full-screen or split-screen views, to monitor front and rear cameras simultaneously. Adjust the touch screen sensitivity for precise control. Additionally, configure the display orientation to match your mounting setup, ensuring the image aligns correctly. These settings enhance user experience, allowing you to tailor the display to your driving needs and preferences.
5.4 Voice Command Settings
The Vantrue N4 Pro supports voice commands, allowing hands-free control for a safer driving experience. Enable voice commands in the settings menu to activate features like starting or stopping recordings, taking snapshots, or switching between camera views. Use predefined commands such as “Start recording,” “Stop recording,” or “Take a photo” to manage your dash cam without distractions. The device responds to clear, spoken instructions, ensuring intuitive operation. You can also customize the voice command sensitivity to reduce false triggers. This feature enhances convenience and safety, letting you focus on the road while maintaining control over your dash cam’s functionality. Refer to the manual for a full list of supported voice commands and setup instructions.
Using the Vantrue App
Explore the Vantrue App, designed to enhance your N4 Pro experience. Download and install the app, then pair it with your dash cam for seamless connectivity. Use it to access and manage recorded footage, adjust settings, and optimize your dash cam’s performance on the go.
6.1 Downloading and Installing the App
To begin using the Vantrue App, download it from the Apple App Store or Google Play Store. Search for “Vantrue” and select the official app. Once downloaded, install it on your smartphone. Ensure your device is connected to the internet for a smooth installation process. After installation, launch the app and familiarize yourself with its interface. The app is designed to work seamlessly with your N4 Pro dash cam, allowing you to access features like video playback, settings adjustment, and firmware updates. Make sure your phone’s operating system is compatible with the app for optimal performance. This step is essential for unlocking the full potential of your Vantrue N4 Pro dash cam.
6.2 Pairing the Dash Cam with the App
To pair your Vantrue N4 Pro dash cam with the app, ensure both devices are powered on and connected to the same Wi-Fi network. Open the Vantrue app and select “Add Device” from the main menu. The app will automatically detect the dash cam. Follow the on-screen instructions to complete the pairing process. If prompted, enter the dash cam’s password, which can be found in the manual or on the device itself. Once connected, you’ll have access to live view, video playback, and settings adjustment directly through the app. Ensure your smartphone and dash cam are in close proximity during pairing for a stable connection. This step is crucial for remote monitoring and managing your dash cam’s functionality.

6.3 Accessing and Managing Footage
Accessing and managing footage on the Vantrue N4 Pro is straightforward via the app. Once paired, open the app to view a list of recorded videos, organized by date and time. Select any clip to play, download, or delete it. You can also enable cloud storage for remote access. The app allows you to sort footage into folders or mark specific clips as favorites for easy retrieval. For larger storage needs, transfer files to your computer via Wi-Fi or a USB connection. Regularly reviewing and managing your footage helps maintain storage capacity and ensures important clips are preserved. Use the app’s intuitive interface to efficiently organize and backup your recordings for future reference or evidence purposes.
6.4 Adjusting Settings via the App
The Vantrue N4 Pro app allows users to adjust various settings remotely for a personalized experience. Through the app, you can modify video resolution, frame rates, and recording modes. Enable or disable features like parking mode, motion detection, and night vision directly from your smartphone; Adjust screen brightness, auto-shutdown timers, and voice command sensitivity for optimal performance. Users can also configure GPS settings, timestamp displays, and loop recording intervals. Additionally, the app enables firmware updates, ensuring your dash cam stays up-to-date with the latest features. Organize and manage storage settings to prevent memory card overload. With these intuitive controls, you can tailor the N4 Pro to meet your specific needs, enhancing functionality and ensuring seamless operation.
Troubleshooting Common Issues
Resolve issues like camera startup problems, video playback errors, or connectivity issues with step-by-step solutions. The manual provides fixes for common glitches and error messages effectively.
7.1 Camera Not Turning On
If the Vantrue N4 Pro camera fails to turn on, check the power source and wiring connections. Ensure the fuse panel is functioning correctly and wires are securely connected. Verify that the hardwire kit is properly installed, as incorrect installation can prevent power supply. If using a cigarette lighter adapter, test it in another vehicle port. Check for any visible damage to the power cable or connectors. Reset the device by disconnecting and reconnecting the power supply. If issues persist, refer to the troubleshooting section in the manual or contact Vantrue support for assistance. Proper installation and power connection are critical for the camera to function correctly.
7.2 Video Playback Issues
If you encounter issues with video playback on the Vantrue N4 Pro, ensure the footage is compatible with your media player. Use the recommended video player software to avoid format-related problems. Check the SD card for corruption by formatting it in the camera or a computer. Ensure the camera’s firmware is up to date, as outdated versions can cause playback errors. If videos appear choppy or pixelated, verify the recording resolution matches the playback settings. Additionally, ensure the device’s screen calibration is correct. For persistent issues, refer to the troubleshooting section or contact Vantrue support for further assistance. Proper setup and maintenance are key to resolving playback problems effectively.
7.3 Connectivity Problems
Connectivity issues with the Vantrue N4 Pro can often be resolved by restarting the device or ensuring a stable Wi-Fi connection. If the dash cam fails to pair with the Vantrue app, check that both devices are connected to the same network. Ensure the app is updated to the latest version and that Bluetooth and Wi-Fi settings are enabled. For wired connections, inspect the cables for damage or loose connections. Resetting the camera to factory settings may also resolve connectivity problems. If issues persist, verify that the firmware is up to date or consult the troubleshooting section for advanced solutions. Proper connectivity is essential for seamless functionality and app integration.
7.4 Error Messages and Solutions

The Vantrue N4 Pro may display error messages such as “SD Card Not Detected” or “Low Battery Warning.” For “SD Card Not Detected,” ensure the card is properly inserted and formatted. If issues persist, try a different SD card. For “Low Battery Warning,” charge the device using the provided cable or hardwire it to your vehicle’s battery. Other errors like “Camera Not Connected” can be resolved by checking the rear camera cable connections. If error messages recur, restart the device or update its firmware; Refer to the troubleshooting section for detailed solutions. Addressing these issues promptly ensures optimal performance and reliability of your dash cam.

Maintenance and Updates
Regular maintenance ensures optimal performance. Clean the lens with a soft cloth and check for firmware updates. Proper storage and battery care extend the device’s longevity.
8.1 Cleaning the Camera Lens

Cleaning the Vantrue N4 Pro’s camera lens is essential for maintaining clear video quality. Use a soft, dry microfiber cloth to gently wipe away dust and smudges. For stubborn spots, lightly dampen the cloth with water, but avoid harsh chemicals or abrasive materials that could damage the lens coating. Regular cleaning prevents streaks and ensures sharp recordings. For optimal results, clean the lens indoors to minimize dust particles in the air. Avoid touching the lens surface with your fingers, as oils can leave residue. If using a cleaning solution, apply it to the cloth, not directly to the lens. This method ensures the camera captures crisp, distortion-free footage, whether during daytime or nighttime driving conditions.
8.2 Updating Firmware
Updating the firmware of your Vantrue N4 Pro is crucial for ensuring optimal performance and accessing new features. To update, visit the official Vantrue website and download the latest firmware version compatible with your device. Use a high-quality memory card and a card reader to transfer the firmware file to the SD card. Insert the card into the dash cam and follow the on-screen instructions to complete the update. Avoid interrupting the process to prevent potential damage. Regularly check for firmware updates to benefit from improved functionality, bug fixes, and enhanced features. This ensures your N4 Pro operates at its best, providing reliable recording and advanced capabilities for your driving needs.
8.3 Storage and Battery Care
Proper storage and battery care are essential for maintaining the performance and longevity of your Vantrue N4 Pro. Use a high-quality memory card compatible with the dash cam and format it regularly to ensure optimal recording. Store the device in a cool, dry place, avoiding extreme temperatures that may damage the battery. When not in use for extended periods, charge the battery to 50% to prevent over-discharge. Avoid exposing the dash cam to direct sunlight or moisture, as this can degrade the components. Clean the camera lens and screen with a soft cloth to maintain clarity. By following these care tips, you can ensure your N4 Pro remains reliable and continues to deliver high-quality performance for years to come.
The Vantrue N4 Pro manual provides a detailed guide to maximizing your dash cam experience. With its advanced features and user-friendly design, this device offers reliable performance and peace of mind for drivers, ensuring high-quality recording and enhanced safety on the road.

9.1 Summary of Key Points
The Vantrue N4 Pro manual is a detailed guide covering installation, features, and troubleshooting. It highlights the dash cam’s 4K recording, night vision, and parking mode. The manual also emphasizes proper installation techniques, such as using adhesion promoters and wiring kits for a seamless setup. Key features like built-in GPS and Wi-Fi are explained, along with tips for maintaining the device, like cleaning the lens and updating firmware. Troubleshooting sections address common issues, ensuring users can resolve problems efficiently. Overall, the manual provides a comprehensive resource to maximize the functionality and longevity of the Vantrue N4 Pro, making it an essential tool for owners seeking to get the most out of their dash cam.
9.2 Final Impressions and Recommendations
The Vantrue N4 Pro manual effectively guides users through setup, operation, and troubleshooting, ensuring a smooth experience. With its 4K recording, night vision, and parking mode, the dash cam offers exceptional performance. Installation is straightforward, especially with the provided wiring kit and adhesion promoter. The manual’s detailed troubleshooting section helps resolve common issues like connectivity problems. Regular firmware updates and lens cleaning are recommended to maintain optimal functionality. Overall, the Vantrue N4 Pro is a reliable choice for drivers seeking high-quality footage and advanced features. For both new and experienced users, this dash cam delivers excellent value, making it a strong recommendation for anyone looking to enhance their vehicle’s safety and security.