rth6360d1002 installation manual
The Honeywell Home RTH6360D1002 is a programmable thermostat designed for ease of use and compatibility with various HVAC systems, offering enhanced home comfort and energy efficiency.
1.1 Features and Benefits of the RTH6360D1002
The RTH6360D1002 offers programmable scheduling, energy-saving modes, and compatibility with most HVAC systems. Its large backlit display ensures easy readability, while the Universal Wall Plate (UWP) simplifies installation. The thermostat supports multiple system types, including heat pumps and dual-fuel systems, and features advanced fan operation settings; Remote sensor compatibility and programmable fan modes enhance comfort control. Energy-saving features help reduce utility bills, and its intuitive interface makes it user-friendly. The UWP ensures secure wall mounting, and the included quick installation guide streamlines the setup process for seamless integration into any home.
1.2 Importance of Proper Installation
Proper installation of the RTH6360D1002 is essential for safe and efficient operation. It ensures your HVAC system runs smoothly, maintains optimal performance, and avoids potential hazards. Incorrect installation can lead to malfunctions, increased energy consumption, or even system damage. Additionally, proper setup guarantees compatibility with your HVAC system and prevents voiding the warranty. Always follow the installation manual carefully to ensure reliability and longevity of the thermostat and your HVAC system. Proper installation also ensures energy efficiency, reducing utility bills and prolonging system lifespan.

Tools and Materials Needed for Installation
To install the RTH6360D1002, you’ll need basic tools like screwdrivers, pliers, and wire strippers. Optional tools include a drill, level, and additional mounting hardware for secure installation.
2.1 Essential Tools: Screwdrivers, Pliers, and Wire Strippers
The RTH6360D1002 installation requires essential tools like a flathead and Phillips screwdriver for removing the old thermostat and securing the new one. Pliers are useful for gripping small wires, while wire strippers ensure clean connections. These tools are fundamental for safely handling electrical components and ensuring proper installation. Always use them carefully to avoid damaging wires or the thermostat unit. Keeping these tools organized will streamline the process and prevent delays. Proper use of these tools is critical for a successful and safe installation of your new thermostat.
2.2 Optional Tools: Drill, Level, and Mounting Hardware
While not mandatory, a drill, level, and additional mounting hardware can enhance the installation process. A drill is useful for creating holes in the wall if the existing ones don’t align. A level ensures the UWP is perfectly straight, preventing uneven installation. Mounting hardware, like wall anchors or screws, provides extra stability, especially in drywall. These tools help achieve a professional-looking setup and prevent potential issues like loose mounting or crooked alignment. Using them can make the installation cleaner and more secure, though they’re not required for basic setup.

Pre-Installation Steps
Ensure the HVAC system is turned off, remove the old thermostat, and label wires for easy identification. These steps ensure a safe and organized installation process.
3.1 Turning Off the HVAC System
Before starting the installation, ensure the HVAC system is completely turned off. Switch the thermostat to the “off” position and verify that all components, including the furnace and outdoor unit, are not operating. This step is critical for safety, preventing any accidental start-ups during the installation process. Additionally, consider turning off the system at the circuit breaker to ensure no power is supplied to the HVAC equipment. This precaution minimizes risks of electrical shocks or damage to the new thermostat.
3.2 Removing the Old Thermostat
To remove the old thermostat, start by disconnecting the wires from their terminals. Gently pull the wires away from the old unit, taking care not to damage them. Once the wires are free, remove any screws or clips holding the thermostat to the wall. Carefully lift the old thermostat away from the mounting plate or wall. If the thermostat is particularly stubborn, use a slight twisting motion to dislodge it. Set the old unit aside for proper disposal or recycling. Handle the wires carefully to avoid bending or pinching them.
3.3 Labeling the Wires for Easy Identification
Before disconnecting the old thermostat, label each wire to ensure easy identification during the installation of the RTH6360D1002. Use small tags or stickers to mark the wires based on their functions, such as “R,” “W,” “Y,” or “C.” This step prevents confusion and ensures proper connections. If the wires are not color-coded, consider using a wire labeling tool or color-coded clips for clarity. Refer to the wiring diagram in the manual to confirm the standard wire color functions. Accurate labeling is crucial for a smooth and error-free installation process. Handle the wires carefully to avoid damage or tangles.
Understanding the Wiring Configuration
Understanding the wiring configuration is crucial for correct installation. Familiarize yourself with the wiring setup using the manufacturer’s guide. Double-check connections to prevent issues.
4.1 Common Wire Colors and Their Functions
Understand the wire colors to ensure proper connections. Typically, the red wire is for 24V power (R), white for heat (W), yellow for cooling (Y), green for the fan (G), and black for common (C). Always refer to the specific wiring diagram in the RTH6360D1002 manual to confirm, as variations may exist. Proper identification prevents incorrect connections, ensuring safe and efficient system operation.
4.2 Connecting Wires to the RTH6360D1002 Terminals
Connect the wires to the RTH6360D1002 terminals carefully to avoid damage. Strip the wire ends if necessary for secure connections. Refer to the wiring diagram in the manual to match each wire to its corresponding terminal. Ensure the wires are tightly secured to prevent loose connections. After connecting, double-check the wiring to confirm accuracy. Proper connections are essential for the thermostat to function correctly and safely. If unsure, consult the manual or seek professional assistance to avoid potential issues.
4.3 Special Cases: Jumper Wires and Dual Transformers
In some systems, jumper wires or dual transformers may be required. Jumper wires connect terminals to enable specific functions, such as continuous power. Dual transformers systems need careful wiring to ensure proper operation. Always refer to the RTH6360D1002 manual for guidance on these configurations. Use the terminal labels provided to avoid confusion. Improper connections can lead to system malfunctions. If unsure, consult a professional or the manual to ensure safe and correct installation. Proper handling of these special cases ensures optimal thermostat performance and system reliability.
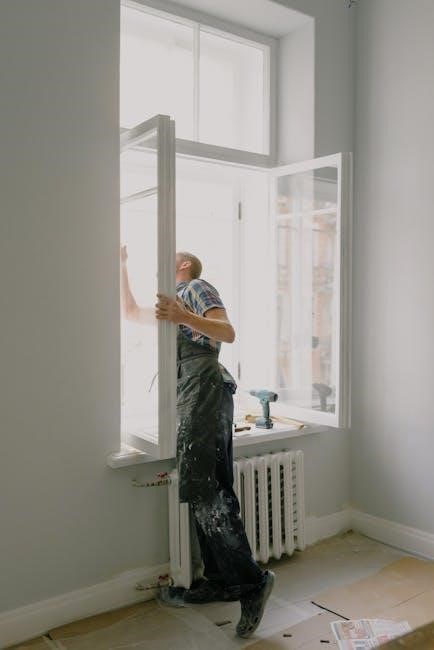
Mounting the UWP (Universal Wall Plate)
Mount the UWP on a flat surface, ensuring proper alignment and level. Secure it firmly using provided screws or anchors. Adjust as needed for optimal fit.
5.1 Aligning and Securing the UWP
To align the Universal Wall Plate (UWP), place it on the wall, ensuring it is level and centered. Peel the backing from the adhesive side and press firmly to secure. If screws are required, drill pilot holes, insert anchors, and screw the plate into place. Check stability by gently tugging. Adjust alignment if necessary. Ensure no wires are trapped beneath the plate. Once secured, verify the plate is flush with the wall for a professional finish. This step ensures proper installation and prevents future issues.
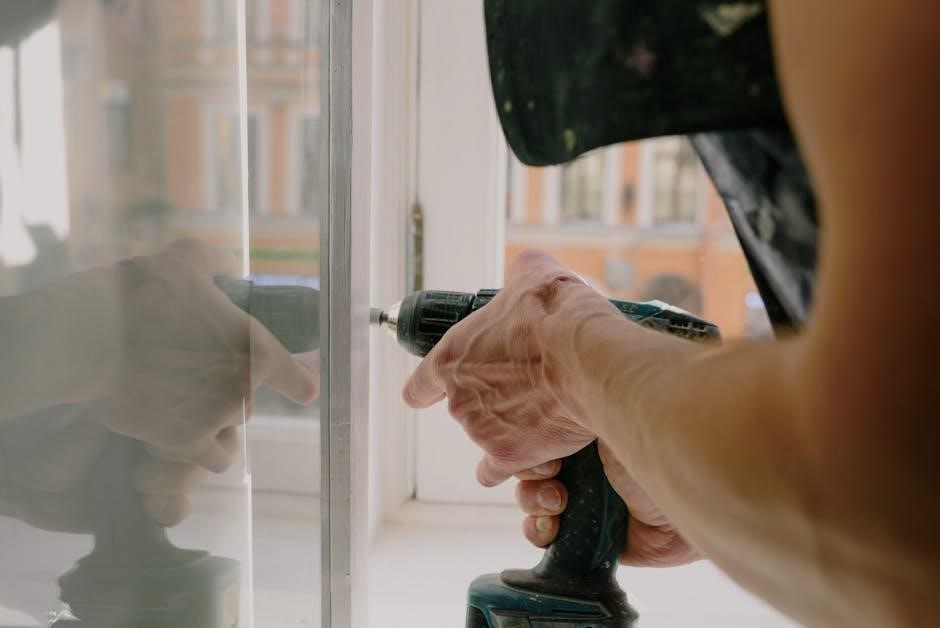
5.2 Drilling Holes and Anchoring the Plate
Using a level, mark the screw hole positions on the wall. Choose a drill bit that matches the screw anchors provided. Drill pilot holes carefully to avoid damaging the wall. Insert wall anchors into the holes to ensure secure mounting. Screw the UWP into place, tightening firmly but avoiding overtightening. Double-check alignment and stability. If installing in a drywall or plaster, ensure anchors are properly seated. This step ensures the plate is securely fastened, preventing any movement or loosening over time. Proper anchoring is crucial for reliable thermostat operation. Always follow manufacturer guidelines.

Installing the Thermostat Unit
Mount the thermostat unit to the UWP, ensuring proper alignment and secure fastening. Connect wires to designated terminals, following the wiring diagram. Tighten all connections firmly.
6.1 Attaching the Thermostat to the UWP
Align the thermostat unit with the UWP, ensuring it is centered and evenly positioned. Secure the thermostat to the UWP using the provided mounting screws. Tighten the screws firmly but avoid over-tightening, which could damage the device. Double-check the alignment to ensure the thermostat is straight and level; Once attached, plug the wire connectors into their corresponding terminals on the thermostat. Verify that all connections are secure and properly seated before proceeding to the next step.
6.2 Connecting the Wires to the Thermostat Terminals
Match the labeled wires from your system to the corresponding terminals on the RTH6360D1002 thermostat. Common wire connections include R (red) for power, W (white) for heat, Y (yellow) for cooling, G (green) for the fan, and C (common) for the transformer. Gently insert each wire into its designated terminal, ensuring it is fully seated. Avoid forcing wires into incorrect terminals, as this could damage the thermostat. Once all wires are connected, double-check the connections for accuracy and security before proceeding.
6.3 Tightening the Wire Connectors
Once the wires are properly connected to the RTH6360D1002 terminals, use a screwdriver to tighten the wire connectors securely. Ensure the wires are fully seated and aligned correctly within the terminal clips. Avoid overtightening, as this could damage the terminals or the wires. After tightening, double-check all connections for firmness and proper alignment. This step ensures reliable operation and prevents potential issues like loose connections or intermittent functionality.
System Setup and Configuration
After installation, configure the RTH6360D1002 by setting system modes, adjusting temperature limits, and enabling advanced features like smart recovery and energy-saving options for optimal performance.
7.1 Setting the Date and Time
To ensure accurate temperature control and scheduling, set the date and time on your RTH6360D1002 thermostat. Access the menu by touching the screen, then select “Date & Time.” Use the arrow keys to adjust the current date and time. Select “Save” to confirm your settings. Ensure the time zone is correct for your location. Accurate date and time settings are essential for proper thermostat operation, especially for scheduling and energy-saving features. Refer to the touchscreen interface for additional formatting options if needed.
7.2 Configuring System Modes (Heat/Cool/Auto)
Configure the system mode to match your HVAC setup. Select “Heat” for heating-only systems, “Cool” for cooling-only systems, or “Auto” for systems that provide both heating and cooling. Tap the mode option on the touchscreen menu to activate your preference. The thermostat will adjust operation based on the selected mode and the set temperature. Ensure the mode matches your HVAC system type for proper functionality. The Auto mode automatically switches between heating and cooling to maintain the desired temperature, optimizing comfort and energy efficiency.
7.3 Adjusting Fan Operation Settings
Adjust the fan operation settings to control airflow and energy usage. Access the fan settings via the thermostat’s menu. Select “Auto” to have the fan run only during heating or cooling cycles, or choose “On” for continuous fan operation. Some models may offer additional options like adjustable fan speeds or timers. Ensure to save your settings after making changes. Proper fan configuration enhances comfort and energy efficiency. Refer to the manual for specific instructions tailored to your system.
Programming the Thermostat
Program the thermostat to create custom temperature schedules, optimizing comfort and energy savings. Set daily or weekly plans, and enable energy-saving modes for efficiency.
8.1 Creating a Daily Schedule
To create a daily schedule, access the thermostat menu and select the scheduling option. Set specific time periods and desired temperatures for each. Choose between Wake, Leave, Return, and Sleep phases to customize comfort levels throughout the day. Adjust temperatures for energy efficiency during periods when the home is unoccupied. Save the schedule to apply it daily. Review and modify as needed to ensure optimal performance and energy savings. This feature allows for consistent temperature control, enhancing both comfort and energy efficiency.
8.2 Setting Temperature Ranges
To set temperature ranges, navigate to the temperature settings menu. Use the up/down arrows to adjust the desired temperature for heating and cooling modes. Set a range that balances comfort and energy efficiency, typically between 68-72°F for heating and 78-82°F for cooling. Ensure the temperature is consistent with your daily schedule for optimal performance. Properly set ranges help maintain energy savings while keeping your home comfortable. Adjust as needed based on personal preference or seasonal changes to maximize efficiency and comfort.
8.3 Enabling Energy-Saving Features
To enable energy-saving features, access the thermostat’s menu and select the energy-saving mode. This feature optimizes heating and cooling usage based on your schedule and preferences. Enable smart recovery to gradually adjust temperatures before your scheduled times. Additionally, activate geofencing if available, which uses your location to optimize energy use when you’re away. These settings help reduce energy consumption while maintaining comfort. Regularly review and adjust these features to ensure they align with your lifestyle and preferences for maximum efficiency and savings.
Testing the Installation
Verify system operation by running a full heating and cooling cycle. Ensure all wire connections are secure and functioning correctly. Confirm thermostat responsiveness and accuracy.
9.1 Verifying System Operation
Turn on the HVAC system and test both heating and cooling modes to ensure proper functionality. Check if the thermostat accurately controls temperature settings. Verify smooth transitions between modes and confirm the system responds to temperature changes. Ensure the fan operates correctly in auto and manual settings. Test humidity control if applicable. Monitor the system for consistent performance and adjust settings as needed. Confirm all features, including energy-saving modes, are functioning as expected. A successful test ensures the thermostat is installed correctly and the system operates efficiently.
9.2 Checking for Proper Wire Connections
Ensure all wires are securely connected to their respective terminals on the RTH6360D1002. Verify that no wires are loose or incorrectly connected. Use the wiring diagram from the manual to cross-check connections. Inspect for any signs of damage or fraying. If necessary, use a multimeter to test continuity and ensure proper voltage readings. Double-check the common (C) wire connection for proper system operation. Secure any extra wire neatly to avoid interference. Proper connections are critical for reliable thermostat performance and system functionality.
9.3 Ensuring Thermostat Responsiveness
After installation, test the thermostat’s responsiveness by adjusting the temperature settings. Ensure the display reacts promptly to button presses. Check if the system turns on and off as commanded. Verify that auto mode transitions smoothly between heating and cooling. Test the fan operation in both manual and auto settings. If the thermostat is unresponsive, restart the system or check for power issues. Proper functionality ensures reliable climate control and energy efficiency. Address any delays or malfunctions promptly to maintain optimal performance.
Troubleshooting Common Issues
Identify common issues like system malfunctions or display errors. Check wire connections, power supply, and system compatibility. Refer to error codes for specific solutions. Ensure proper installation and configuration for reliable operation.
10.1 Heating or Cooling Not Turning On
If the heating or cooling system fails to turn on, check the thermostat settings and ensure it is set to the correct mode (Heat, Cool, or Auto). Verify that the temperature setpoint is correctly adjusted and that the system is not in an energy-saving mode. Ensure the HVAC system’s power switch is on and the circuit breaker or fuse is not tripped. Also, check for any blockages in vents or air filters. If issues persist, review the wiring connections and consult the error codes displayed on the thermostat for specific troubleshooting guidance.
10.2 Incorrect Wire Connections
Incorrect wire connections are a common issue during installation. Ensure all wires are securely fastened to the correct terminals on the thermostat. Verify that the wires match the terminal labels (e.g., R, W, Y, G, C) as specified in the manual. Loose connections can prevent the system from functioning properly. If wires are connected to the wrong terminals, the HVAC system may not operate as intended. Consult the wiring diagram in the manual to confirm proper connections and double-check each wire before proceeding.
10.3 Display Issues or Error Codes
Display issues or error codes on the RTH6360D1002 thermostat can indicate system malfunctions. If the display is blank, flickering, or showing incorrect information, check the power supply and wire connections. Error codes like “E1” or “E2” typically point to specific issues, such as sensor problems or communication errors. Refer to the user manual for code meanings. Restart the thermostat by removing and reinstalling the batteries (if applicable). If issues persist, consult the troubleshooting guide or contact customer support for assistance. Ensure firmware is up to date, as outdated software can cause display problems.
Maintenance and Upkeep
Regular maintenance ensures optimal performance of your RTH6360D1002 thermostat. Clean the display gently to avoid dust buildup. Replace batteries annually or as needed. Check for software updates to keep your system running smoothly.
11.1 Cleaning the Thermostat
Cleaning the RTH6360D1002 thermostat is essential for maintaining its functionality. Use a soft, dry cloth to wipe the display and exterior surfaces. Avoid harsh chemicals or abrasive materials, as they may damage the screen or casing; For stubborn spots, dampen the cloth slightly with distilled water, but ensure no moisture enters the internal components. Regular cleaning prevents dust buildup, which can interfere with temperature sensing and display clarity. This simple maintenance step helps ensure accurate performance and extends the thermostat’s lifespan. Clean monthly or as needed when dust accumulation is visible.
11.2 Replacing Batteries (If Applicable)
The RTH6360D1002 thermostat uses long-lasting batteries to maintain its functionality. If your model requires battery replacement, ensure the HVAC system is turned off. Open the thermostat by gently pulling it away from the wall plate or removing the front cover. Carefully remove the old batteries and insert new ones, matching the correct polarity. Replace the cover and turn the power back on. Use high-quality, alkaline batteries for optimal performance. Always refer to the manufacturer’s guidelines for recommended battery types. Regular battery checks and replacements prevent system malfunctions and ensure reliable operation.
11.3 Updating Software or Firmware
Regular software updates ensure your RTH6360D1002 thermostat operates with the latest features and security patches. To update, access the thermostat’s menu and check for available updates. If an update is found, follow on-screen instructions to download and install. Some updates may require a computer or app connection. Always power down the HVAC system before updating. Once installed, restart the thermostat to apply changes. Refer to the manufacturer’s guide for detailed steps. Keeping firmware current enhances performance and compatibility with your HVAC system.
Successful installation of the RTH6360D1002 thermostat ensures enhanced comfort and energy efficiency. With proper setup and maintenance, it reliably regulates your HVAC system for optimal performance.
12.1 Final Checks and Verification
After completing the installation, perform a thorough inspection to ensure all connections are secure and correctly configured. Verify that the thermostat is properly mounted and aligned. Test the system by running through heating, cooling, and fan modes to confirm smooth operation. Check for any error codes or unusual behavior. Ensure the display is responsive and all programmed settings are functioning as expected. Finally, review the installation manual to confirm all steps were followed accurately and no details were overlooked.
12.2 Enjoying the Benefits of Your New Thermostat
With the RTH6360D1002 installed, you can now enjoy enhanced comfort, energy efficiency, and convenience. Take advantage of programmable scheduling to tailor your temperature settings to your lifestyle. Utilize remote access via the Honeywell Home app to control your system from anywhere. Explore advanced features like geofencing and smart alerts to optimize your energy usage. Regularly review energy reports to identify savings opportunities. Experience consistent comfort with precise temperature control and silent operation. Your new thermostat is designed to provide long-term reliability and satisfaction, making it a valuable upgrade for your home.