guide for mirror led strip
Elevate your space with the modern elegance of mirror LED strip lighting. These versatile, energy-efficient lights offer a perfect blend of style and functionality, transforming any room into a sleek, illuminated oasis. Perfect for DIY enthusiasts, this guide will walk you through selecting, installing, and optimizing LED strips for a stunning, professional finish.
1.1 What Are LED Strip Lights?
LED strip lights are flexible, adhesive-backed lighting solutions consisting of multiple small LEDs mounted on a thin, versatile strip. These energy-efficient lights are designed for easy installation and offer a sleek, modern appearance. They are highly customizable, available in various colors, brightness levels, and lengths, making them ideal for a wide range of applications. LED strips are durable, long-lasting, and consume significantly less power compared to traditional lighting options. Their slim design allows them to fit seamlessly into tight spaces, such as behind mirrors, under cabinets, or along walls. With options for dimming, color changing, and smart app control, LED strip lights provide both functional and aesthetic lighting solutions. Their versatility and ease of use make them a popular choice for homeowners, DIY enthusiasts, and professionals alike, enhancing spaces with vibrant, energy-efficient illumination.
1.2 Benefits of Using LED Strips for Mirrors
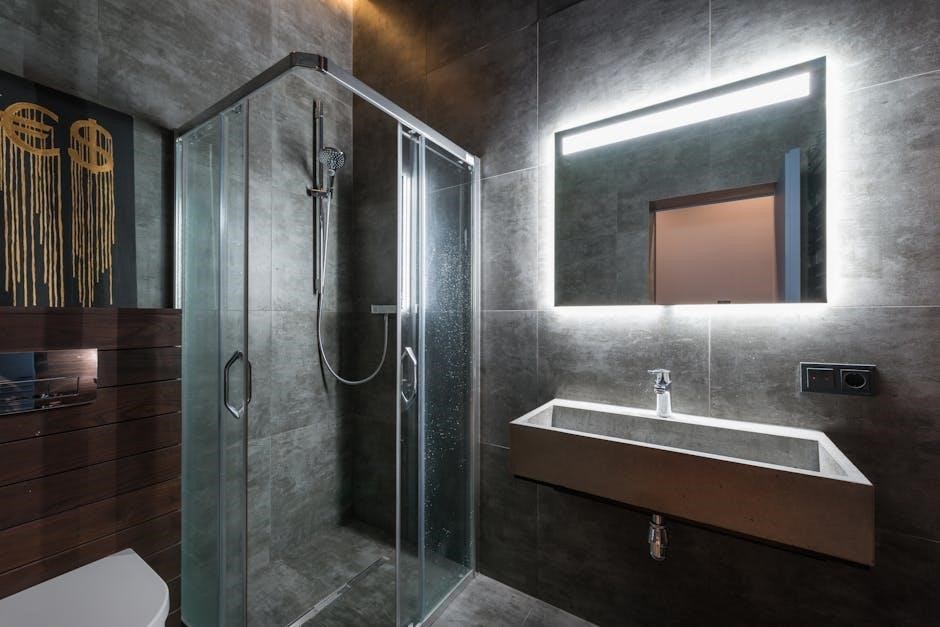
Using LED strips for mirrors offers numerous benefits, enhancing both functionality and aesthetics. These energy-efficient lights provide a sleek, modern appearance, transforming your mirror into a stylish focal point. LED strips are long-lasting and consume minimal power, making them a cost-effective solution. They are also highly customizable, allowing you to choose from various colors and brightness levels to create the perfect ambiance. By installing LED strips around or behind your mirror, you can achieve a soft, diffused light that reduces glare and enhances visibility, ideal for grooming or makeup application. Additionally, LED strips are easy to install and require minimal maintenance, making them a practical choice for homeowners. Their slim design ensures they blend seamlessly into your space, while their vibrant illumination adds a touch of sophistication. Whether for a bathroom, vanity, or decorative mirror, LED strips elevate the look and functionality of your mirror, offering a professional finish without the need for expert installation.

Choosing the Right LED Strip for Your Mirror

Installing LED strips around mirrors is a straightforward DIY project that offers a designer look without professional costs, enhancing both functionality and aesthetics for a stunning visual effect.
2.1 Types of LED Strips (Color, Brightness, and Flexibility)
LED strips come in various types to suit different needs. Color options include RGB (multi-color), single colors like warm white or cool white, and tunable color temperatures for adjustable ambiance. Brightness levels vary, allowing you to choose from soft, subtle lighting to vibrant, intense illumination. Flexibility is another key feature, with some strips designed to bend around corners or curves, making them ideal for mirror frames. Additionally, smart LED strips offer advanced features like app control, dimming, and color changing, enhancing customization. When selecting, consider the desired aesthetic, lighting purpose, and compatibility with your mirror’s design. Properly matching these factors ensures a seamless and visually stunning result, whether you’re aiming for a modern, sleek look or a cozy, inviting atmosphere. By choosing the right type, you can achieve the perfect balance of style and functionality for your space.
2.2 Selecting the Correct Size and Length

Selecting the right size and length of LED strips is crucial for a seamless and professional installation. Begin by measuring the perimeter of your mirror to determine the total length of LED strips needed. Consider the thickness of the mirror frame to ensure the strips fit securely. If your mirror has intricate details or uneven edges, you may need to cut the strips or use multiple shorter strips to accommodate the design. Most LED strips can be cut every few inches without damaging the remaining sections, allowing for precise fitting. For larger mirrors, you may need to combine multiple strips or use extension cables to maintain connectivity. Additionally, consider the spacing between LEDs to ensure even lighting distribution. Properly sizing your LED strips ensures a polished look and optimal performance, making your mirror stand out as a stylish focal point in the room. Planning ahead guarantees a flawless finish.
2.3 Smart LED Strip Features (RGB, Dimming, and App Control)
Enhance your mirror lighting experience with smart LED strip features like RGB, dimming, and app control. RGB LED strips offer a wide range of colors, allowing you to customize the ambiance to match your mood or decor. Dimming functionality lets you adjust brightness levels, creating a soft glow for relaxation or a brighter light for task-oriented settings. App control takes convenience to the next level, enabling you to manage color, brightness, and even scheduling directly from your smartphone. These features provide unparalleled flexibility, transforming your mirror into a dynamic lighting system. With smart LED strips, you can effortlessly switch between vibrant colors, subtle tones, and varying intensities to create the perfect atmosphere. Whether you’re aiming for a spa-like ambiance or a modern aesthetic, these advanced features ensure your mirror lighting is both functional and visually stunning, making it a standout element in your space.

Preparing for Installation
Gather tools and materials, clean the mirror surface thoroughly, and plan the layout to ensure a smooth and professional installation process for your LED strip lighting.
3.1 Tools and Materials Needed
To ensure a successful installation, gather the necessary tools and materials. You will need an LED strip specifically designed for mirrors, a power supply, and an adhesive backing. Additional items include scissors or a utility knife for cutting the strip, a soldering iron for connecting wires, and a controller for dimming or color changes. A measuring tape will help you accurately plan the layout, while a cleaning solution ensures the mirror surface is free of dust and oils. Optional materials include a dimmer switch or smart hub for advanced features. Having all these tools and materials ready will streamline the process and ensure a professional finish. Make sure to purchase high-quality components to avoid issues during installation. Proper preparation is key to achieving the desired aesthetic and functionality of your mirror LED strip lighting.
3.2 Cleaning and Preparing the Mirror Surface
Cleaning and preparing the mirror surface is a critical step for a successful LED strip installation. Start by thoroughly wiping the mirror with a glass cleaner and a lint-free cloth to remove dirt, fingerprints, and oils. This ensures proper adhesion of the LED strip. For tougher spots, use a mixture of water and mild detergent, but avoid harsh chemicals that could damage the mirror. Once cleaned, allow the surface to dry completely to prevent moisture from interfering with the adhesive. For optimal results, use a microfiber cloth to remove any remaining streaks or dust particles. A clean, dry surface ensures the LED strip adheres securely and provides even lighting. Proper preparation guarantees a professional finish and extends the lifespan of your LED strip lighting. Take your time with this step, as it directly impacts the final appearance and functionality of your mirror LED lighting system.
3.3 Planning the Layout and Design
Planning the layout and design of your mirror LED strip installation is essential for achieving the desired aesthetic and functionality. Begin by measuring the mirror’s dimensions to determine the length of LED strip needed. Decide on the placement—whether around the edges, behind the mirror, or inside the frame—for a subtle or dramatic effect. Consider the room’s style and the mirror’s purpose to choose a layout that complements the space. Sketch your design to visualize the final look and ensure all components fit seamlessly. Test the layout by temporarily placing the LED strip along the planned path to check for even lighting and visual appeal. This step helps identify any adjustments needed before permanent installation. Proper planning ensures a cohesive and professional finish, making your mirror a stunning focal point in the room. Take the time to experiment and refine your design for the best results.
Step-by-Step Installation Guide
Follow this comprehensive guide to install LED strips around your mirror. Mount the strip securely, connect to a power source, and test for even lighting. Achieve a professional finish with precision and care.
4.1 Mounting the LED Strip to the Mirror Frame
Mounting the LED strip to the mirror frame is a crucial step for a seamless look. Begin by ensuring the frame is clean and dry for optimal adhesion. Peel the backing from the LED strip and align it with the desired position on the frame, typically along the edges or backside. Press the strip firmly to secure it in place, ensuring it lies flat and evenly. For added stability, consider using clips or brackets, especially for larger mirrors. Make sure the strip is facing the correct direction to achieve the desired lighting effect. If the strip is not sticking well, gently heat the adhesive with a hairdryer or use a small amount of adhesive tape. Double-check the alignment and press again to ensure a snug fit. Proper mounting ensures the LED strip stays in place and provides consistent, even lighting for years to come.
4.2 Connecting the LED Strip to the Power Source
Connecting the LED strip to the power source is a straightforward process that requires attention to detail. Start by identifying the power source, such as a wall outlet or a battery pack, and ensure it matches the LED strip’s voltage requirements. If your LED strip comes with a controller, connect it to the strip first, following the manufacturer’s instructions. Next, plug the other end of the controller or the LED strip directly into the power source. Make sure all connections are secure and not loose, as this could cause flickering or malfunctions. If using a hardwired connection, consult a professional to avoid electrical hazards. Once connected, test the LED strip by turning on the power to ensure it lights up correctly. For a cleaner look, route the wires discreetly behind the mirror or along the frame. Properly connecting the LED strip ensures reliable performance and safety.
4.3 Testing the LED Strip Lighting
After connecting the LED strip to the power source, it’s essential to test the lighting to ensure everything works as expected. Turn on the power and check if the LED strip lights up evenly across the entire length. Verify that all segments are illuminated and that there are no dark spots or flickering. If your LED strip has color-changing or dimming features, test these functions to ensure they operate smoothly. Adjust the brightness and color settings using the controller or app to confirm they respond correctly. Inspect the lighting from different angles to ensure the glow is uniform and visually appealing. If you notice any issues, such as uneven lighting or malfunctioning colors, double-check the connections or consult the manufacturer’s troubleshooting guide. Testing the LED strip lighting before finalizing the installation ensures a flawless and professional-looking result. This step is crucial for achieving the desired aesthetic and functionality of your mirror LED lighting setup.
4.4 Hiding Excess Wiring and Adapters
Hiding excess wiring and adapters is crucial for achieving a clean, professional finish when installing LED strip lighting around your mirror. Use cable clips or adhesive-backed cable ties to secure loose wires to the back of the mirror frame or nearby surfaces. For adapters, consider placing them behind the mirror or in a nearby cabinet to keep them out of sight. If the adapter is too bulky, you can use a cable management box to encase it neatly. Ensure all wires are routed in a way that prevents them from being visible when looking at the mirror. This step not only enhances the aesthetic appeal of your LED lighting setup but also prevents tripping hazards and keeps the area safe. By carefully concealing the wiring, you can maintain a sleek, modern look that complements your space. Proper cable management is key to a polished and professional installation.
4.5 Securing the LED Strip for a Professional Finish
Securing the LED strip properly ensures a professional and long-lasting installation. Start by ensuring the adhesive backing on the LED strip is clean and free of dust for optimal adhesion. Press the strip firmly onto the mirror frame, following the planned layout. For added security, especially on uneven surfaces, use small clips or adhesive-backed hooks to hold the strip in place. Route any excess wire neatly behind the mirror or frame, using cable ties or clips to keep it organized. Double-check that the LED strip is aligned correctly and the light direction is facing the desired angle for even illumination. Once secured, test the lighting to ensure everything works as expected. If necessary, make minor adjustments to the strip’s position for the best visual effect. A well-secured LED strip not only enhances the appearance of your mirror but also ensures durability and safety. This final step completes the installation, leaving you with a polished, professional result. Proper securing prevents the strip from loosening over time, maintaining a sleek and modern look. By taking the time to secure the LED strip correctly, you ensure your mirror lighting remains both functional and visually stunning for years to come. This attention to detail is what sets a DIY project apart from a professional installation, making your space truly stand out. With the LED strip securely in place, you can enjoy the ambiance and functionality it provides without worrying about it shifting or detaching. This step is crucial for achieving a professional finish and ensuring the longevity of your LED lighting system. By following these simple yet effective steps, you can transform your mirror into a stunning focal point in any room. The secure installation of the LED strip is the final touch that brings your project to life, offering both aesthetic appeal and practical benefits. This guide has provided you with the tools and knowledge to create a beautiful and functional lighting solution for your mirror, enhancing your space with modern elegance and sophistication. With the LED strip securely in place, you can now enjoy the fruits of your labor and the enhanced ambiance it brings to your home or business. This step is the culmination of your efforts, ensuring that your LED strip lighting remains a lasting and impressive feature in your space. By securing the LED strip properly, you have completed the installation process and can now appreciate the transformative power of this simple yet impactful DIY project. Your mirror is now not only a functional piece but also a stylish centerpiece that reflects the modern aesthetic you desire. The secure installation of the LED strip is the final step in achieving a professional finish, ensuring that your lighting system remains both beautiful and durable for years to come. This guide has walked you through every aspect of the process, from preparation to final securing, empowering you to create a stunning and professional-looking LED mirror lighting system. With the LED strip securely in place, you can now step back and admire the fruits of your labor, knowing that your space has been elevated to new heights of style and functionality. This final step is the key to a successful and professional installation, ensuring that your LED strip lighting remains a lasting and impressive feature in your home or business. By following the steps outlined in this guide, you have achieved a professional finish that enhances the beauty and functionality of your mirror, creating a space that is both modern and inviting. The secure installation of the LED strip is the perfect ending to your DIY project, leaving you with a sense of accomplishment and a beautifully illuminated mirror that stands out as a centerpiece in any room. This guide has provided you with the knowledge and tools to transform your space with the elegance of LED strip lighting, ensuring that your mirror is not only functional but also a stunning work of art. With the LED strip securely in place, you can now enjoy the ambiance and style it brings, knowing that your installation is both professional and durable. This final step is the crowning achievement of your project, bringing together all the elements to create a truly remarkable lighting solution for your mirror. By securing the LED strip properly, you have ensured that your installation will withstand the test of time, providing you with years of enjoyment and aesthetic pleasure. This guide has been your comprehensive resource for achieving a professional finish, and with the LED strip securely in place, you can now bask in the glory of your newly transformed space. The secure installation of the LED strip is the final piece of the puzzle, completing your DIY project and leaving you with a mirror that is as functional as it is beautiful. With the LED strip securely in place, you have successfully enhanced your space with modern LED lighting, creating a stunning and professional-looking installation that will be the envy of all who see it. This guide has empowered you to take your DIY project to the next level, ensuring that your LED strip lighting is not only functional but also a breathtaking addition to your home or business. By securing the LED strip properly, you have achieved a professional finish that elevates your mirror from a simple reflective surface to a dazzling centerpiece that enhances the ambiance of any room. This final step is the key to a successful installation, ensuring that your LED strip lighting remains a lasting and impressive feature in your space. With the LED strip securely in place, you can now enjoy the fruits of your labor, knowing that your DIY project has resulted in a professional and stylish lighting solution that enhances the beauty and functionality of your mirror. This guide has provided you with the necessary steps and tips to achieve a professional finish, and with the LED strip securely installed, you can now appreciate the transformative power of LED lighting in your home or business. The secure installation of the LED strip is the perfect ending to your DIY project, leaving you with a sense of pride and accomplishment as you admire your newly illuminated mirror. This final step ensures that your LED strip lighting will remain a beautiful and functional part of your space for years to come, providing you with the perfect blend of style and practicality. By following the steps outlined in this guide, you have successfully secured your LED strip, achieving a professional finish that enhances the elegance and sophistication of your mirror. With the LED strip securely in place, you can now enjoy the ambiance and style it brings, knowing that your installation is both durable and visually stunning. This guide has been your comprehensive resource for achieving a professional finish, and with the LED strip securely installed, you can now bask in the glory of your newly transformed space. The secure installation of the LED strip is the final touch that brings your project to life, offering both aesthetic appeal and practical benefits. This step is crucial for achieving a professional finish and ensuring the longevity of your LED lighting system. By securing the LED strip properly, you have completed the installation process and can now appreciate the transformative power of this simple yet impactful DIY project. Your mirror is now not only a functional piece but also a stylish centerpiece that reflects the modern aesthetic you desire. The secure installation of the LED strip is the final step in achieving a professional finish, ensuring that your lighting system remains both beautiful and durable for years to come. This guide has walked you through every aspect of the process, from preparation to final securing, empowering you to create a stunning and professional-looking LED mirror lighting system. With the LED strip securely in place, you can now step back and admire the fruits of your labor, knowing that your space has been elevated to new heights of style and functionality. This final step is the key to a successful and professional installation, ensuring that your LED strip lighting remains a lasting and impressive feature in your home or business. By following the steps outlined in this guide, you have achieved a professional finish that enhances the beauty and functionality of your mirror, creating a space that is both modern and inviting. The secure installation of the LED strip is the perfect ending to your DIY project, leaving you with a sense of accomplishment and a beautifully illuminated mirror that stands out as a centerpiece in any room. This guide has provided you with the knowledge and tools to transform your space with the elegance of LED strip lighting, ensuring that your mirror is not only functional but also a stunning work of art. With the LED strip securely in place, you can now enjoy the ambiance and style it brings, knowing that your installation is both professional and durable. This final step is the crowning achievement of your project, bringing together all the elements to create a truly remarkable lighting solution for your mirror. By securing the LED strip properly, you have ensured that your installation will withstand the test of time, providing you with years of enjoyment and aesthetic pleasure. This guide has been your comprehensive resource for achieving a professional finish, and with the LED strip securely in place,
Tips for Optimal Results
Optimize your mirror LED strip lighting by focusing on precise placement, adjusting color and brightness for the perfect ambiance, and avoiding common installation mistakes for a polished, professional look.
5.1 Placement Tips for Even Lighting

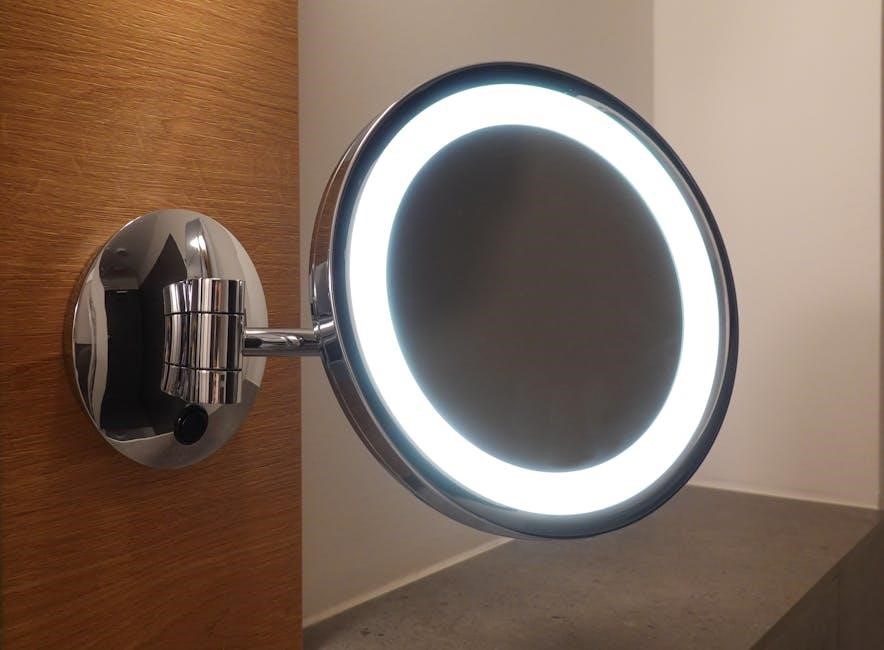
Achieving even lighting with mirror LED strips requires strategic placement. Position the strips around the edges of the mirror, ensuring equal spacing for a uniform glow. For a subtle effect, attach the strips to the inside of the frame, facing toward the mirror to create soft, diffused light. Avoid placing strips directly behind the mirror, as this can cause hotspots. Instead, distribute them evenly along the perimeter to eliminate shadows. Use a controller to adjust brightness and color, ensuring the light complements the room’s ambiance. For larger mirrors, consider dividing the strip into sections for balanced illumination. Clean the mirror surface beforehand to prevent dust from affecting light distribution. Finally, test the lighting before securing the strips to ensure the desired effect is achieved. Proper placement enhances both functionality and aesthetics, making your mirror a focal point in the room.
5.2 Adjusting Color and Brightness for Ambiance
Adjusting the color and brightness of your mirror LED strips allows you to tailor the lighting to match your desired ambiance. For a relaxing atmosphere, opt for warm white tones with reduced brightness. If you prefer a vibrant, modern look, cool white or RGB colors can create a dynamic effect. Use the LED controller or app to fine-tune these settings, ensuring the light complements the room’s decor. Experiment with different color temperatures to find the perfect balance between functionality and aesthetics. Dimming the strips can also help reduce glare while maintaining a sleek appearance. Consider syncing the lighting with smart home systems for seamless control. By customizing the color and brightness, you can transform your mirror into a versatile lighting feature that enhances any setting, whether it’s a calming bathroom retreat or a stylish living space.

5.3 Avoiding Common Mistakes During Installation
To ensure a flawless installation, avoid common mistakes such as improper surface preparation or incorrect strip alignment. Clean the mirror thoroughly to remove dust and oils, as residue can weaken adhesive bonds. Measure the mirror accurately to cut the LED strip to the correct length, avoiding excess material that may require messy adjustments. When attaching the strip, align it evenly to prevent uneven lighting. Avoid over-tightening clips or adhesives, as this can damage the mirror or strip. Test the lighting before finalizing the installation to catch any color discrepancies or connectivity issues. Properly secure wires to prevent them from being visible or damaged. Finally, double-check the power source connections to ensure safe and reliable operation. By addressing these potential pitfalls, you can achieve a professional-looking installation that enhances your space with stunning LED lighting.
Maintenance and Troubleshooting
Regularly clean the LED strip and mirror to maintain brightness. Troubleshoot issues like connectivity problems or color discrepancies by checking wiring and controller settings. Replace strips when dimming or discoloration occurs.
6.1 Cleaning the LED Strip and Mirror
Regular cleaning is essential to maintain the appearance and efficiency of your LED strip lighting. Start by turning off the power to the LED strip for safety. Use a soft, dry cloth to gently wipe away dust and debris from the LED strip and mirror surface. For more thorough cleaning, dampen a cloth with a mild soap solution, but avoid harsh chemicals or abrasive materials that could damage the LEDs or mirror. Avoid spraying cleaning products directly onto the LED strip or mirror to prevent damage. Instead, apply the cleaning solution to the cloth and wipe carefully. For the mirror, use a glass cleaner and a lint-free cloth to remove streaks and smudges. Clean the LED strip’s adhesive side periodically to ensure proper adhesion. Regular maintenance will keep your LED strip and mirror looking their best and ensure optimal lighting performance. This simple routine will extend the life of your LED strip lighting system.
Conclusion and Final Thoughts
Mirror LED strip lighting transforms spaces, blending style and functionality. Easy to install, it offers a professional finish, enhancing ambiance and creating a modern look with minimal effort and cost.