
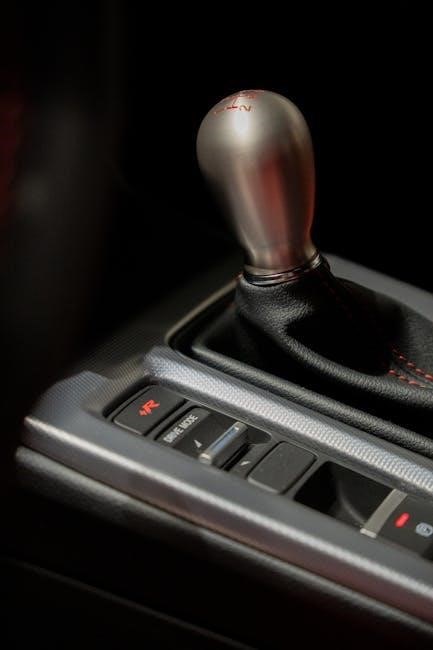
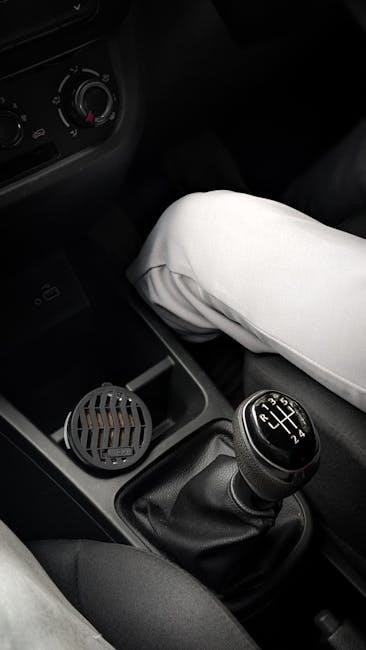
240sx manual transmission swap
Discover how to transform your Nissan 240SX from automatic to manual transmission. This guide provides a comprehensive overview of the process, benefits, and essential steps for a successful swap, enhancing performance and driver control.
Why Convert from Automatic to Manual Transmission?
Converting your 240SX from automatic to manual transmission offers enhanced driving engagement and control. Manual transmissions provide better acceleration, fuel efficiency, and driver connection to the vehicle. For enthusiasts, a manual setup often improves performance and reduces maintenance costs. Additionally, manual transmissions are typically more durable and require less complex repairs compared to automatics. Many drivers prefer the tactile experience of shifting gears, making it a popular modification for performance and hobbyists alike. This swap is particularly appealing for those seeking to optimize their 240SX’s potential, whether for racing, drifting, or everyday driving, ensuring a more responsive and satisfying experience behind the wheel.
Overview of the Swap Process
Swapping from an automatic to a manual transmission in a 240SX involves replacing the automatic components with manual counterparts. This includes installing a manual transmission, flywheel, clutch kit, and driveshaft. The process requires removing the automatic transmission, disconnecting its wiring and hydraulic systems, and fitting the manual setup. Wiring adjustments are necessary to integrate the manual transmission harness and speed sensor. Additionally, the shifter and mounting bracket must be installed. While challenging, the swap is achievable with proper tools, expertise, and guidance. Detailed tutorials and forums provide step-by-step instructions to ensure a smooth transition. This modification enhances performance and driver engagement.

Planning and Preparation
Planning and preparation are crucial for a successful swap. Evaluate your vehicle’s condition, budget for parts, and gather tools and expertise. Utilize online tutorials and forums for guidance.
Assessing Your Vehicle’s Condition
Before starting the swap, evaluate your 240SX’s overall condition. Check the engine, transmission, and drivetrain for any existing damage or wear. Ensure the vehicle is mechanically sound to avoid complications during the conversion. Inspect the automatic transmission components, such as the torque converter and flex plate, to determine if they can be reused or must be replaced. Additionally, examine the electrical and wiring systems to identify any issues that may require attention. A thorough assessment will help you identify potential challenges and ensure a smoother transition to manual transmission. Proper preparation now saves time and effort later in the process.
Budgeting for the Swap
Budgeting for a 240SX manual transmission swap requires careful planning to cover all necessary parts and tools. Key expenses include the manual transmission itself, flywheel, clutch kit, driveshaft, and transmission harness. Additional costs may arise for tools, such as a transmission jack or specialized wrenches. Labor costs should also be considered if professional assistance is needed. Prices vary depending on the source and condition of parts, with OEM and aftermarket options offering different price points. Plan for unexpected expenses by allocating a contingency fund. Proper budgeting ensures the swap progresses smoothly without financial setbacks, allowing you to prioritize essential components and avoid overspending.
Tools and Expertise Required
A successful 240SX manual transmission swap demands specific tools and mechanical expertise. Essential tools include a transmission jack, socket set, wrenches, and a clutch alignment tool. A basic understanding of transmission systems and mechanical aptitude are crucial. While DIY-friendly, the complexity requires patience and attention to detail. Experienced mechanics or enthusiasts with prior transmission work will find the process manageable. Novices should consider professional assistance, especially for critical steps like wiring adjustments or bellhousing modifications. Proper tools and knowledge ensure a smooth, error-free swap, avoiding costly mistakes and ensuring reliability post-installation. Preparation is key to achieving a successful conversion.
Parts Selection for the Swap
Selecting the right components is vital. Key parts include transmission mounts, adapter plates, and specialized hardware for a successful manual swap.
Transmission Options (S13 vs. S14)
Choosing between the S13 and S14 transmissions depends on your setup. The S13 transmission is a popular choice for its compatibility with earlier models, while the S14 offers slightly better gear ratios for performance driving. If using an S13 transmission, you may need an S14 manual speed sensor for proper operation. Both transmissions require specific adapters and mounts to ensure proper fitment. Consider your engine type and driving goals when selecting. The S14 transmission is often preferred for its improved strength and gear spacing, making it a better option for turbocharged or high-performance builds. Choose wisely to match your vehicle’s specifications.
Flywheel and Clutch Kit
A proper flywheel and clutch kit are essential for the manual swap. The flywheel must be compatible with your engine type, such as the KA24DE or SR20DET. A lightweight flywheel is often recommended for improved throttle response and better performance. The clutch kit should match the flywheel specifications to ensure smooth engagement and durability. When selecting, consider your driving style and performance goals. High-performance clutch kits are ideal for turbocharged or heavily modified engines. Proper installation ensures reliable operation and prevents premature wear. Always verify compatibility and seek professional advice if unsure about the setup for your specific 240SX model.
Driveshaft and Mounting Bracket
The driveshaft and mounting bracket are critical components in the manual transmission swap. The driveshaft must be compatible with the new manual transmission and differential setup. Ensure it is properly balanced and aligned to avoid vibrations. The mounting bracket secures the transmission to the chassis, requiring precise fitment for stability. Inspect the driveshaft for wear and consider professional balancing if necessary. A heavy-duty transmission mount is recommended to handle the added stress of a manual setup. Proper installation of these components ensures smooth power delivery and prevents long-term damage to the drivetrain. Always verify compatibility and seek professional assistance if unsure about specifications or installation.
Transmission Harness and Speed Sensor
The transmission harness and speed sensor are essential for proper communication between the manual transmission and the vehicle’s systems. When swapping, ensure the harness is repinned to match the manual transmission’s specifications. The speed sensor must be compatible with the new setup, as it affects speedometer accuracy and ABS functionality. For S13 transmissions, an S14 manual speed sensor is often required. Proper wiring adjustments are critical to avoid errors. Consult a wiring diagram or seek professional assistance for accurate repinning. Test the setup post-installation to ensure all systems function correctly. This step ensures seamless integration of the manual transmission with the vehicle’s electronics.

Installation Process
The installation involves removing the automatic transmission and replacing it with the manual setup. This includes fitting the new transmission, driveshaft, and adjusting the wiring harness properly.
Removing the Automatic Transmission
The process begins with draining the ATF fluid and disconnecting the battery to prevent electrical issues. Remove the center console and finisher plate to access the transmission. Disconnect the wiring harness, shift linkage, and coolant lines connected to the automatic transmission. Next, remove the transmission mount and crossmember bolts. Carefully slide the transmission out of the chassis, ensuring the torque converter remains attached until fully extracted. Separate the transmission from the engine, taking note of any additional components that may need removal. Properly support the engine during this process to avoid damage. This step requires patience and careful handling to avoid complications.
Installing the Manual Transmission
With the automatic transmission removed, carefully align the manual transmission with the engine. Bolt the transmission to the engine, ensuring proper alignment of the input shaft and pilot bearing. Install the clutch and flywheel, followed by the transmission mount and bracket. Reconnect the driveshaft, making sure it is securely fastened. Attach the shift linkage and wiring harness, ensuring proper connections. If using an S13 transmission, install the S14 manual speed sensor for compatibility. Tighten all bolts and connections, and double-check the alignment. Finally, refill the transmission fluid and test the clutch pedal for proper operation. Ensure all components are securely fastened before proceeding.
Wiring Adjustments and Harness Repinning
After installing the manual transmission, focus on wiring adjustments and harness repinning. The automatic transmission harness must be modified to accommodate the manual setup. Repin the transmission harness to ensure proper communication with the ECU. Install the manual transmission speed sensor, particularly if using an S13 transmission in an S14 chassis. Connect the reverse light switch and clutch switch wiring. Ensure all electrical connections are secure and properly routed. If equipped, integrate the manual transmission gear position sensor. Double-check the wiring diagram to avoid errors. Common issues include incorrect wiring or sensor configuration, which can lead to transmission or ECU malfunctions. Consult a wiring diagram or seek professional assistance if unsure.
Post-Installation Steps
After installation, test the transmission thoroughly. Ensure smooth shifting and proper engagement. Conduct final adjustments and inspections. Troubleshoot any issues arising from wiring or sensor configuration.

Testing the Transmission
After completing the manual swap, thorough testing is crucial to ensure functionality. Start with low-speed maneuvers to check smooth shifting and clutch engagement. Gradually increase speed, testing acceleration and gear transitions under load. Monitor for any unusual noises or vibrations, which could indicate issues with the driveshaft, mounts, or alignment. Pay attention to the engagement point of the clutch pedal, ensuring it feels consistent and precise. Additionally, test the reverse gear for proper operation. If any problems arise, revisit the installation steps to identify and address potential causes, such as incorrect wiring or misaligned components.
Final Adjustments and Inspections
Post-installation, perform a detailed inspection to ensure all components are securely fastened and properly aligned. Recheck the clutch pedal adjustment for optimal engagement and disengagement. Inspect the driveshaft, transmission mounts, and crossmember for any signs of misalignment or damage. Verify that all electrical connections, such as the transmission harness and speed sensor, are secure and functioning correctly. Test the gear shifts again to ensure smooth operation. Finally, take the car for a test drive to confirm proper performance under various conditions. Address any lingering issues promptly to avoid future complications. A thorough inspection ensures reliability and safety after the swap.
Troubleshooting Common Issues
After completing the manual transmission swap, common issues may arise, such as difficulty shifting gears or clutch engagement problems. Check the clutch pedal adjustment and ensure proper hydraulic system bleeding. Grinding noises during shifting could indicate misaligned gears or lack of clutch disengagement. Verify the driveshaft balance and transmission mount stability. Electrical gremlins, like incorrect wiring or a faulty speed sensor, can disrupt proper operation. Consult diagrams for proper harness repinning and ensure the speed sensor is calibrated. If issues persist, inspect for loose connections or damaged components. Addressing these problems promptly ensures smooth performance and prevents further damage to the transmission system. Professional assistance may be required for complex electrical or mechanical faults.